Add Assets From Partsmaster
Before you can use the Add Assets From Partsmaster workflow, it is necessary to populate the PartsMaster template table:
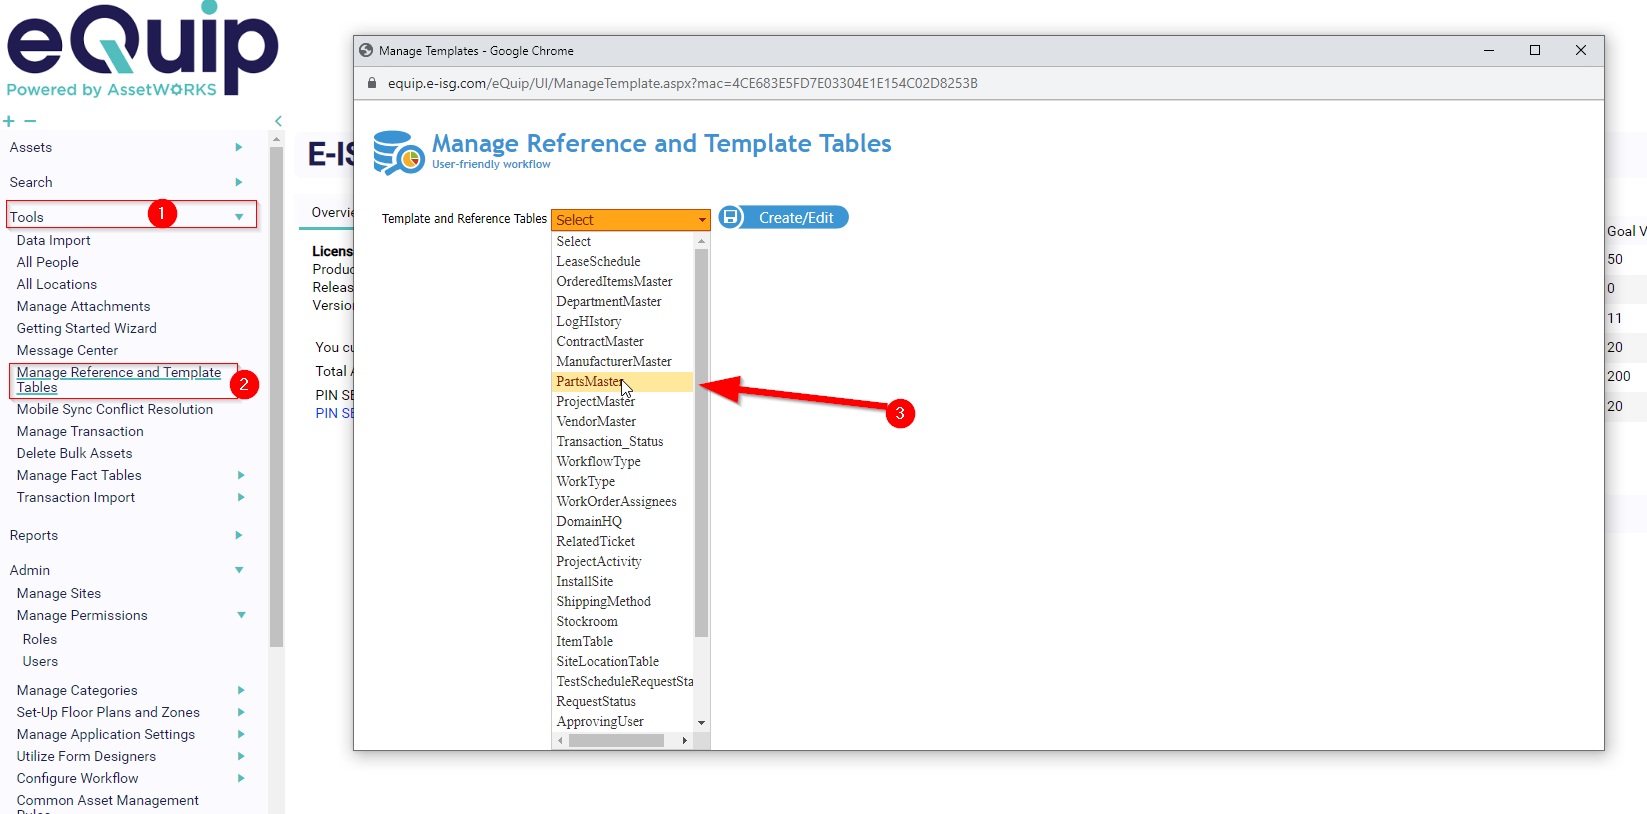
- Go to TOOLS > Manage Reference and Template Tables
- Select PartsMaster from the dropdown list
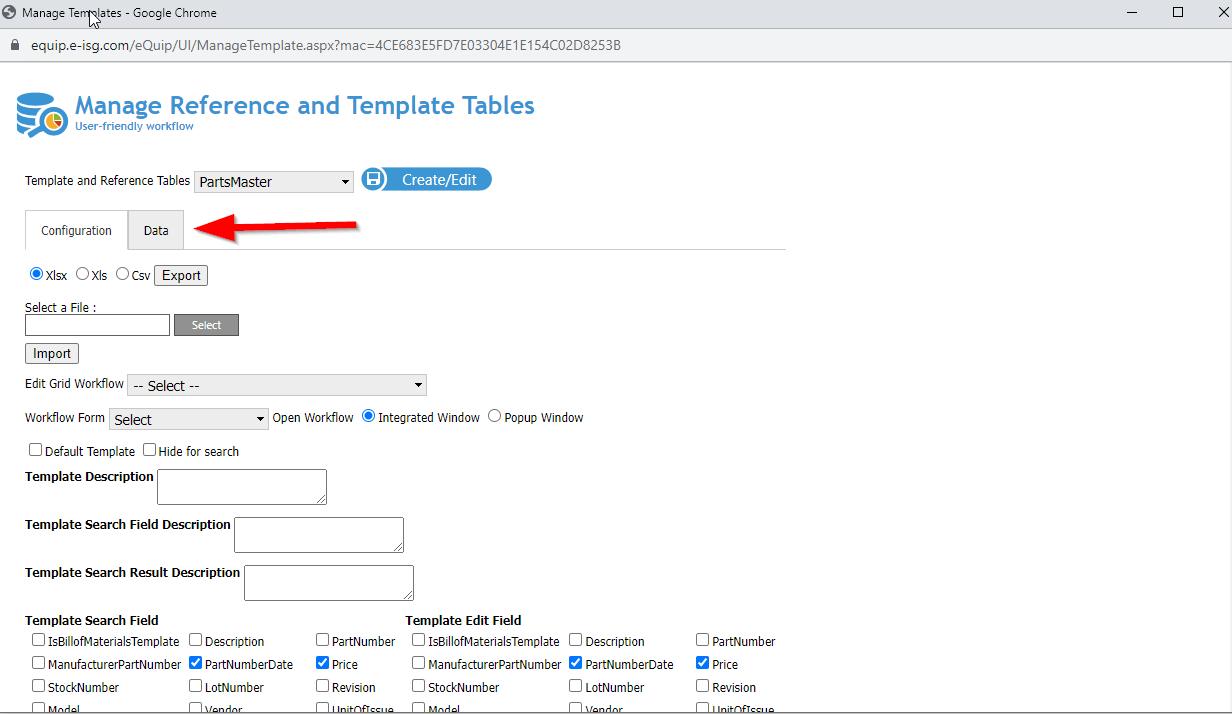
- On the Data tab choose Add new record
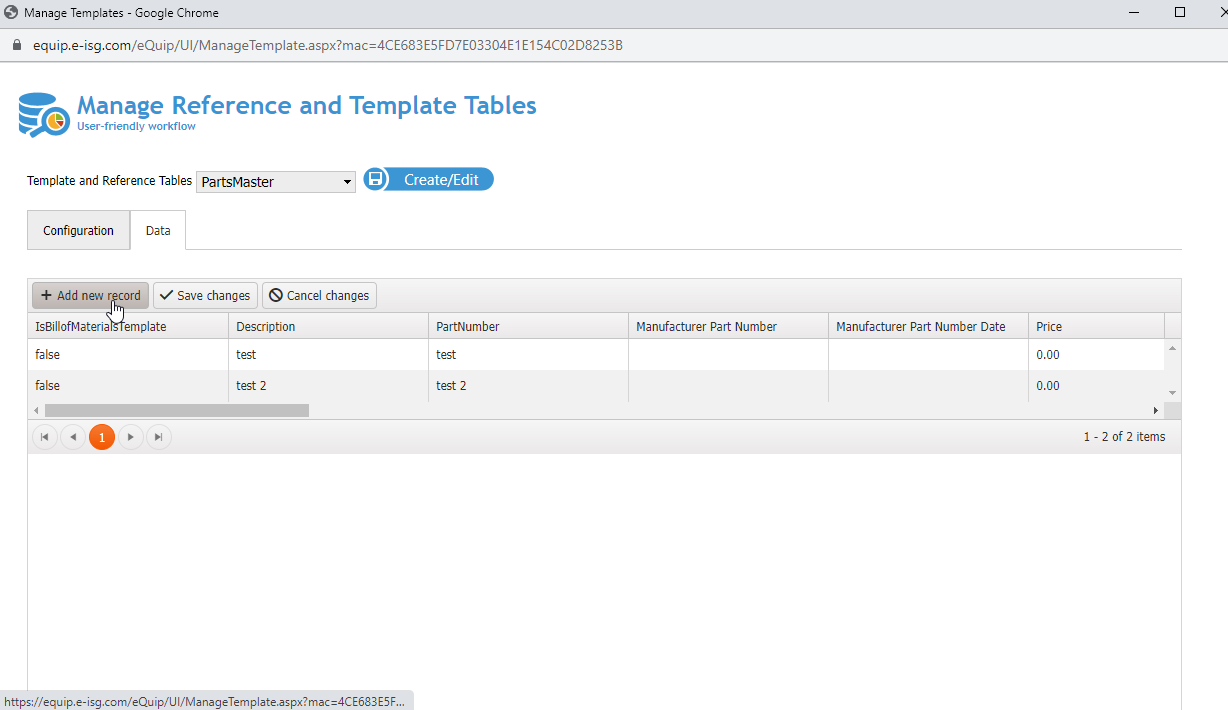
- Enter a value for each field
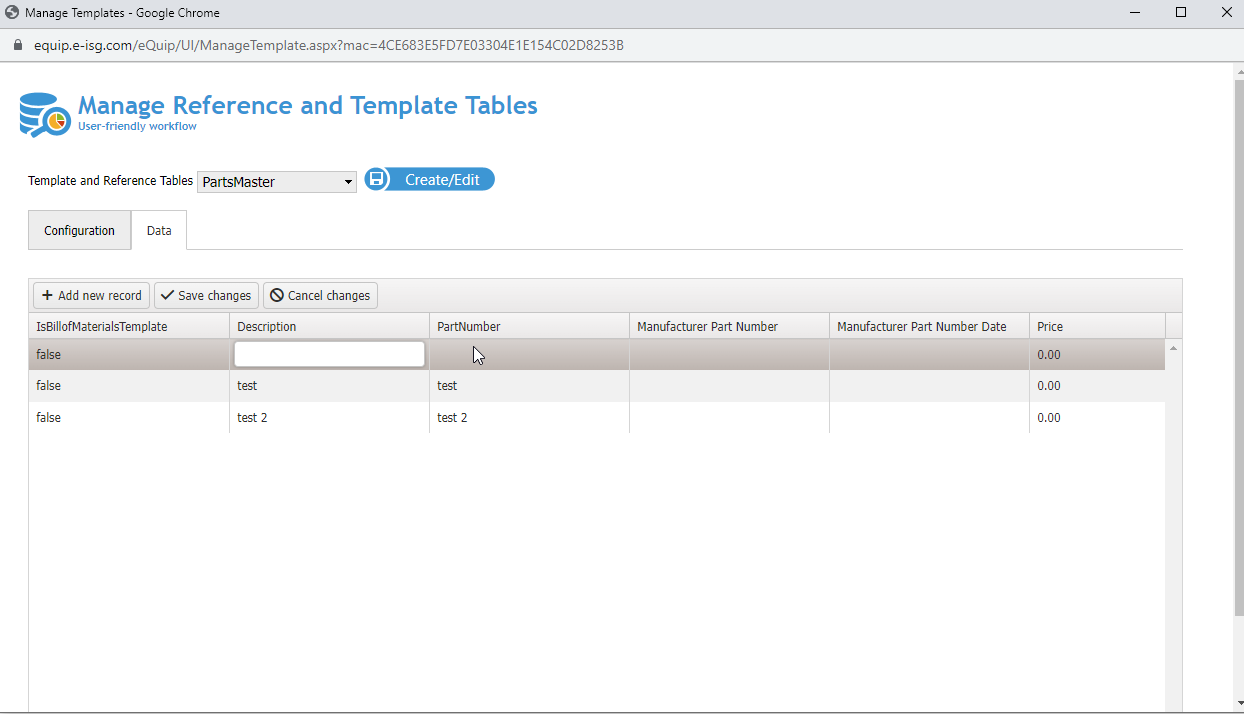
- When you have finished entering values choose Save changes
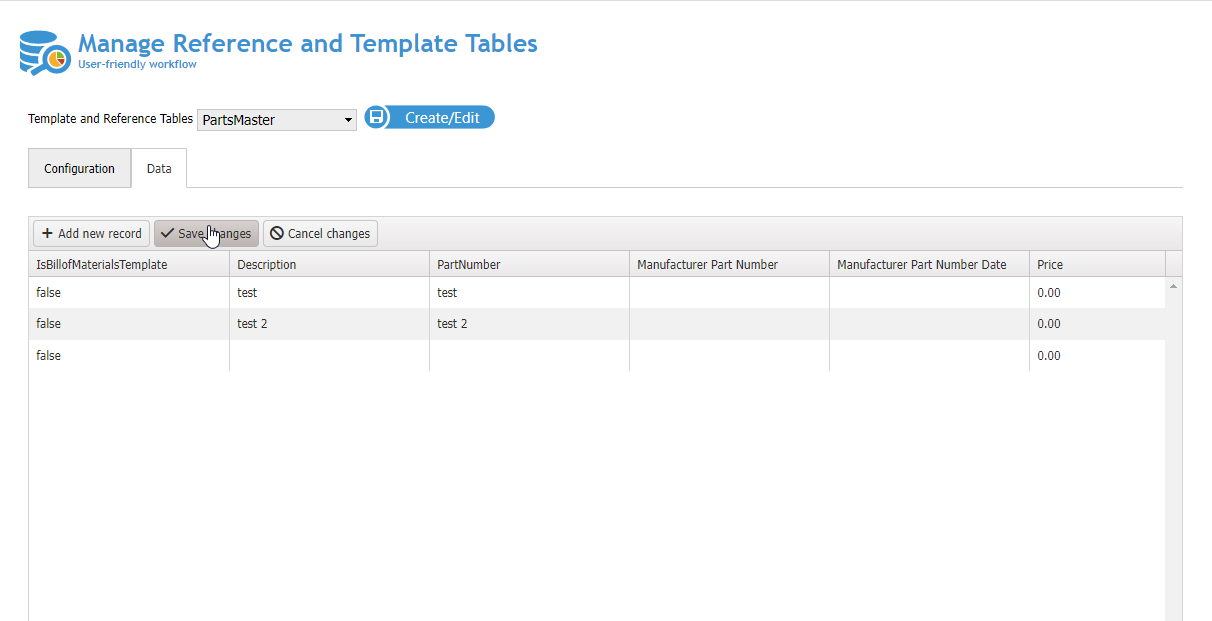
-
- The asset is now available to choose in the workflow
- Add additional assets as needed
- It is also possible to populate asset information in the template table in bulk
- Go to TOOLS > Manage Reference and Template Tables

- On the configuration tab choose Export to export a template that is populated with the asset information that currently exists in the table
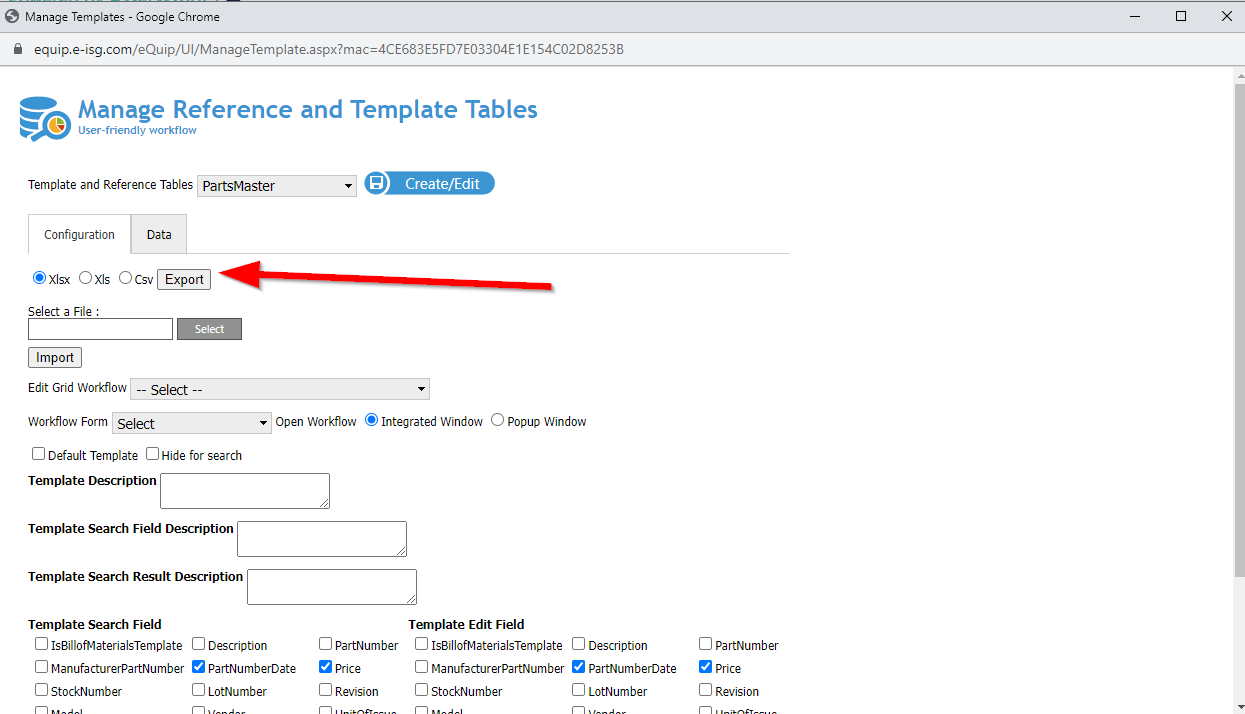
-
- The file is save to your Downloads folder by default
- You can edit the information in any of the cells to update asset information
-
- To import completely new asset information delete the rows that exist and enter the new information (Note Please be sure to leave the ID column header in place but leave the sub entries blank )
- Save the template when done and then choose Select to locate the saved template on your computer (in Downloads)
-
- Choose Import
- The asset information is now saved in the table
- To use the actual workflow go to ASSETS> Add Assets > Add Assets From Partsmaster
- Choose a line item by clicking it that row
- In the window that appears you can choose or fill in values for any of the empty fields on the asset form
-
- Choose or enter values for at least the required fields (those with a *)
- Choose Save to save the changes in eQuip
- Choosing Save & Reuse will do the following:
-
- Save the asset that you created initially
- Generate a unique Barcode* number for the next asset that you want to create
- Leave some frequently used fields populated with the same value as the last asset so that you do not have to manually enter the values again (but they can still be edited)
